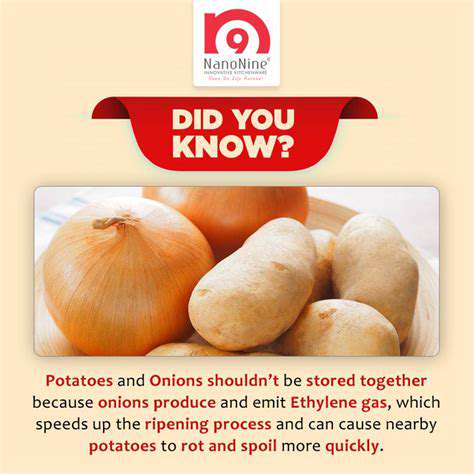
Best Ways to Store Onions and Potatoes
The secret to long-lasting onions lies in creating the perfect storage climate. A consistently cool basement or root cellar between 32-40°F (0-4°C) with about 65-70% humidity works wonders. This environment slows down the natural decomposition process without causing freezing damage. Interestingly, onions store best when kept slightly warmer than potatoes but cooler than most pantry items.
Ventilation and Air Circulation
Proper airflow prevents the buildup of ethylene gas and excess moisture that leads to rot. Never store onions in plastic bags - the trapped moisture will ruin them within days. Instead, use mesh produce bags, old pantyhose (with knots between onions), or slatted wooden crates that allow continuous air movement while keeping the bulbs separated.
Proper Storage Location Considerations
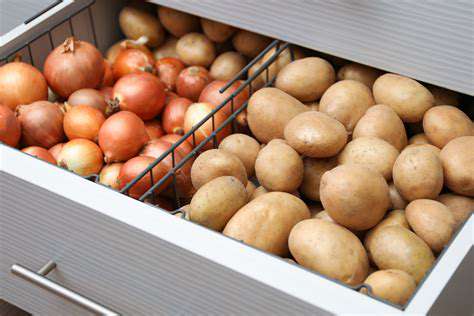
Location selection makes all the difference in onion preservation. Keep them far from potatoes (which release moisture) and fruits like apples that emit ethylene gas. A dark corner of an unheated garage or a specially designed root cellar shelf works perfectly. The key is finding a spot that maintains consistent conditions without temperature swings.
Onion Handling and Preparation for Storage
Preparation begins right after harvest or purchase. Always cure onions for 2-3 weeks in a warm, dry area with good airflow before long-term storage. This crucial step allows the outer layers to dry completely and the necks to seal shut. Handle them gently to avoid bruising, and never remove the papery outer skins which provide natural protection.
Onion Storage Containers and Materials
The right container can double an onion's shelf life. Wicker baskets allow ideal air circulation while keeping onions in darkness. For larger quantities, wooden crates with slatted sides work well. Some gardeners swear by the traditional method of braiding the dried tops together and hanging the strands from rafters - this combines excellent airflow with space efficiency.
Long-Term Onion Preservation Strategies
For year-round onion supply, consider creating a dedicated storage area with temperature and humidity controls. Many experienced gardeners use modified refrigerators (set to just above freezing) or insulated basement rooms. Check stored onions monthly, removing any that show signs of softening. With perfect conditions, some varieties can last 6-8 months.
Potato Preservation: Maintaining Crispness and Flavor
Preserving Potato Crispness: Crucial Techniques
The key to crispy potatoes starts with proper post-harvest handling. After digging, let them dry in a shaded, well-ventilated area for several hours to toughen the skins. Never wash potatoes before storage - the residual moisture invites rot. Instead, gently brush off excess dirt once they're completely dry. Different varieties have varying storage potentials, with russets generally outperforming red or white types.
Controlling Temperature for Optimal Storage
Temperature management is critical for potato longevity. Maintain storage between 38-42°F (3-6°C) to prevent starch conversion to sugars, which affects both texture and flavor. Interestingly, potatoes stored too cold develop an unpleasant sweetness when cooked. Use a thermometer to monitor your storage area, as even small fluctuations can impact quality over time.
Proper Handling and Preparation for Long-Term Storage
Handle potatoes like fragile eggs to prevent bruising. Always sort potatoes before storage, removing any with cuts, bruises, or green spots. These imperfections release enzymes that accelerate spoilage in surrounding tubers. For best results, store potatoes in single layers rather than deep piles to minimize pressure points and allow even air circulation.
Understanding the Role of Humidity in Potato Preservation
Humidity control presents a delicate balance. 90-95% relative humidity prevents shriveling without encouraging mold. Achieve this by placing a pan of water in the storage area or covering potatoes with damp burlap sacks. Check periodically for condensation - if present, increase ventilation slightly. Proper humidity keeps skins firm and flesh moist for months.
Different Storage Methods for Varying Needs
Storage solutions should match your available space and climate. Perforated plastic bins with wood shavings between layers work well for moderate quantities. For larger harvests, build wooden bins with ventilation gaps. Urban dwellers can use breathable fabric bags in the coolest closet. Remember - complete darkness is as important as temperature control to prevent greening.
Preventing Sprouting: Key Strategies for Potato Longevity
Understanding Potato Sprouting
Sprouting signals a potato's natural lifecycle progression, triggered by internal hormones responding to time and environment. Newer potatoes sprout faster than mature storage varieties, so always plan to use them first. The sprouts themselves draw nutrients from the tuber, causing shriveling and flavor changes. Interestingly, organic potatoes often sprout sooner due to the absence of commercial sprout inhibitors.
Optimizing Storage Conditions
Create an environment that tells potatoes it's not yet spring. Combine complete darkness with temperatures just above 38°F (3°C) to dramatically slow sprouting. Some gardeners place apples with stored potatoes - the ethylene gas slightly inhibits sprout development. However, this method requires careful monitoring as it can also accelerate spoilage if overdone.
Proper Handling and Cleaning
Minimize handling to preserve the potato's natural protective coating. Never wash potatoes until ready to use, and always handle them with clean, dry hands. Even minor skin breaks become entry points for bacteria. If you must clean before storage, do so gently with a soft brush after the potatoes are completely dry from harvest.
Using Moisture-Controlling Strategies
Moisture management requires a Goldilocks approach. Line storage containers with newspaper to absorb excess humidity while maintaining the proper moisture balance. Replace the paper monthly or when damp. Some gardeners alternate layers of potatoes with sheets of moss or straw - these natural materials regulate humidity beautifully while allowing air circulation.
The Role of Light Exclusion
Light exposure triggers multiple problems simultaneously. Even brief light exposure activates chlorophyll production (causing greening) and sprout initiation. Use opaque containers or cover clear ones with dark fabric. Check potatoes with a flashlight when necessary, minimizing exposure time. Remember - greened potatoes contain solanine and should never be eaten.
Temperature Control and Monitoring
Consistency matters more than perfect numbers. A steady 40°F (4°C) with minor fluctuations preserves better than cycling between 35-45°F. Digital data loggers help track conditions over time. In root cellars, place potatoes on middle shelves where temperatures remain most stable, avoiding both floor and ceiling areas which experience greater variation.
Employing Proper Storage Techniques
Strategic storage extends usefulness. Store seed potatoes separately from eating potatoes at slightly warmer temperatures (40-45°F). Rotate stock using the first in, first out principle. Consider dividing your harvest into multiple small batches - if one spoils, you won't lose everything. With careful attention, some varieties can last until the next growing season.
Read more about Best Ways to Store Onions and Potatoes


![Best Burgers in [City]](/static/images/28/2025-05/HiddenGems26LocalFavorites3AUncoveringtheBestKeptSecrets.jpg)

![Review: [Specific Cuisine] Restaurant Experience in [City]](/static/images/28/2025-05/FinalThoughts3AAHighlyRecommendedDiningDestination.jpg)


